JellyPages.com

Friday, February 14, 2014

Card samples for Tues Feb 18 and Wed Feb 19th classes

WOW  it has been a LONG time since I posted hasn't it.  Life has been crazy busy lately and to be perfectly honest, I completely forgot about blogging.   I will try to be more faithful about keeping the blog updated.
Today I am sharing card samples from the next classes.   I called the class "how'd she do that?" because the techniques used may be new to you.
Here are the pictures of the cards we will be creating AND the techniques I used to create them.
This card uses the polished stone and faux bleach techniques.

This card features the glitter lace and chalk popping techniques.

and this card is done using the reverse chalking technique.
This card features a technique called reverse masking.

and last is the ultimate glitter napkin technique.   

We will be making all 5 of these cards in the Tue and Wed classes.  
To learn more about my classes,  please see the right panel on this page.   Hope to see you at class!

Sunday, January 5, 2014

STARTING A NEW YEAR OF CLASSES

good morning to all of you.  It is Sunday the 5th of January already.   I have been busy getting a new set of cards ready for you for the cardmaking class at Hobby Lobby Tue Jan 7th at 9:30 AM or 5:15 Pm and again on Thur Jan 9th at 5:15 Pm.   These cards were inspired by cards I found on either Pinterest or Splitcoaststampers and outside of a few minor changes they have pretty much been cased.  
The theme this class is all occasion cards and I chose to offer 2 thank you cards, 2 birthdays cards and a sympathy card.   Here they are-------------

This is the first of 2 thank you cards.    It is an easel card.
It is a gift as well as a ty card in that it holds a calender for the coming year.

This is the 2nd thank you card and I just love the greeting.   Cute isn't it?

This is the sympathy card.   
The layout is copied from one I found while surfing the net and I just loved the layers.   

now this one is my design.  I found some fun embossed pearlescent pink paper at Hobby Lobby and just wanted to use a touch of it (cause it was $2 a sheet)   So this is what I came up with.   On the inside is a nice birthday verse. 

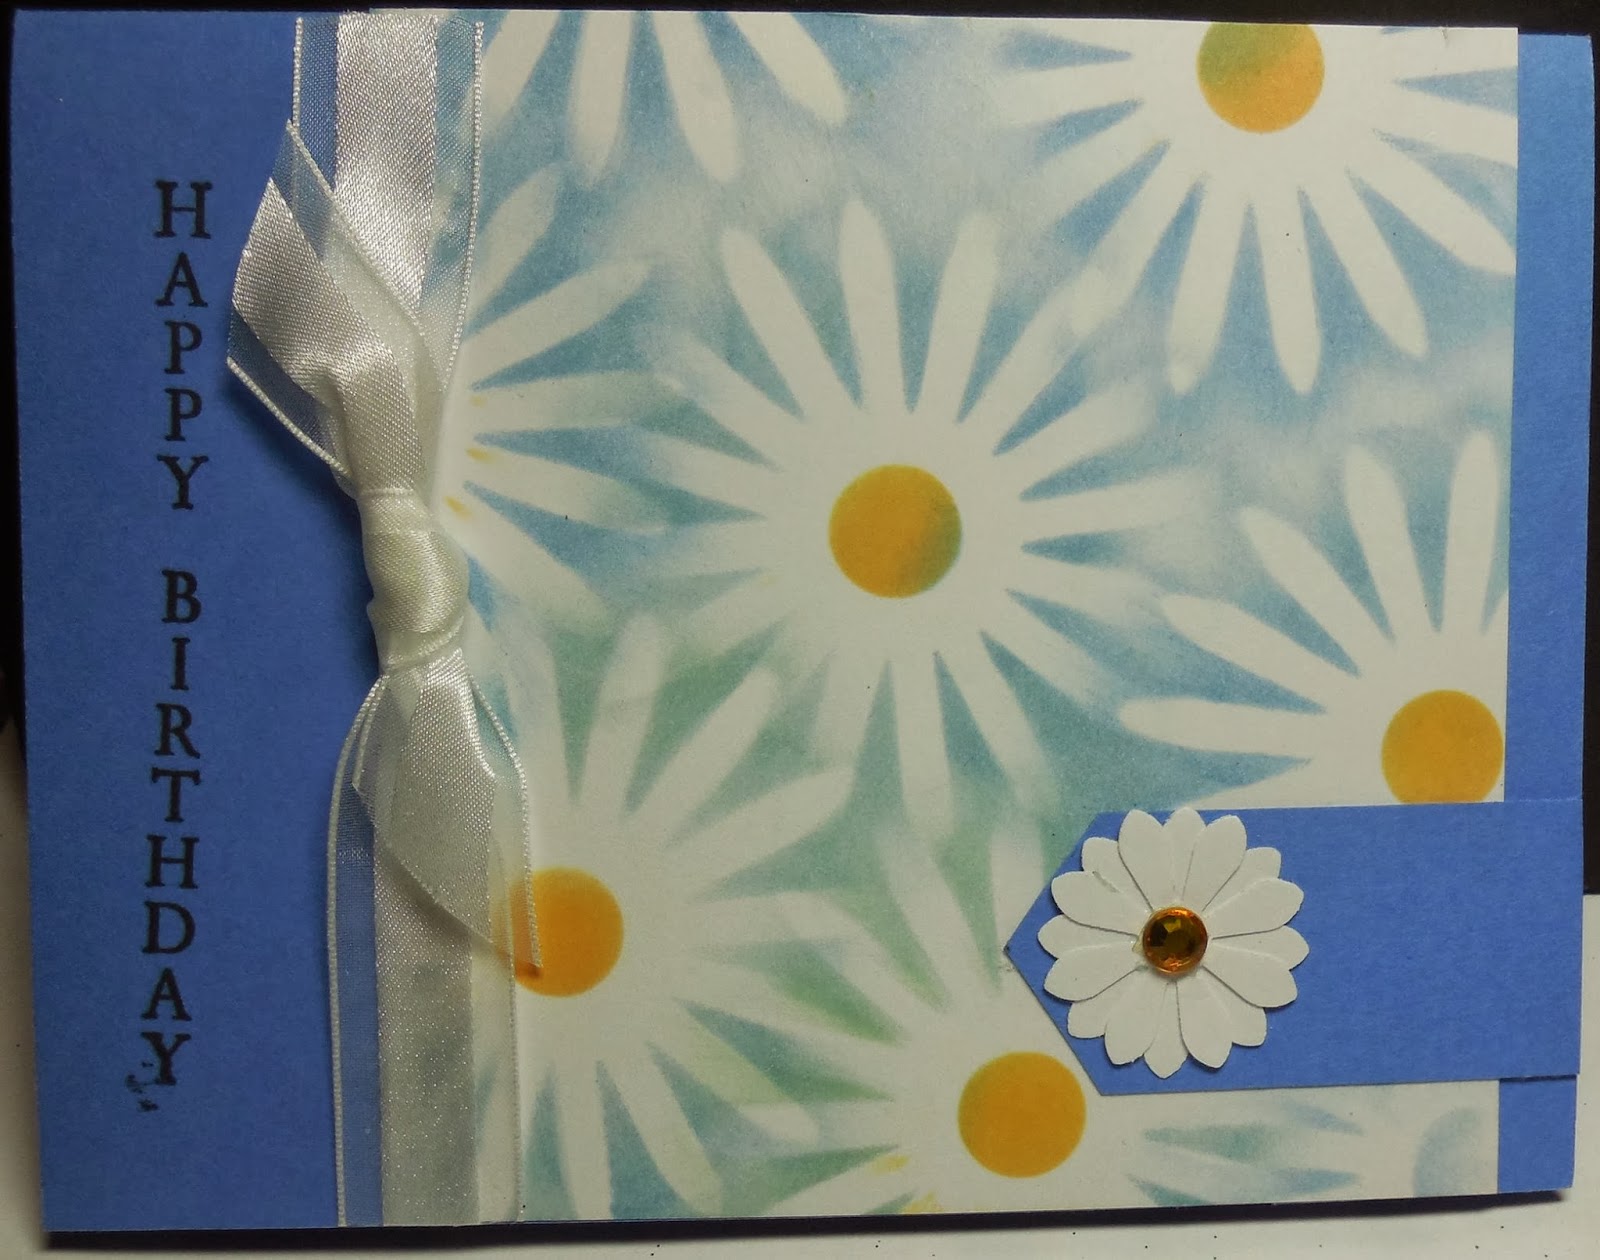
and last is this daisy birthday card.    Definetly one I copied,   I really love daisies and so chose to duplicate the card.   The centers of the daisies have fun flock on this so they are soft and fuzzy.
Well thats it for this week.   Will be back late next week with 5 cards for the gentlemen.   That seems to be the most difficult of cards to do.    See you then.

Sunday, December 22, 2013

7 weeks of Christmas Final post

I am so sorry but time has gotten away from me and I haven't posted for a week again.   Sooooooooooo since last weekend was my crafting weekend with my 2 grand daughters I thought I would share pictures of how we spent our 2 days together.   We had so much fun and I think the pictures show it.    So here we go------------
On Saturday morning we all got dressed and ate a hearty breakfast before heading to the mall to attend Jacobs holiday concert.  He plays the violin with a group of orchestra students at his school.   Here are pictures of the kids after the concert.   Pretty good looking bunch aren't they?
Grammy (as they call me) is soooooooooo blessed!


Then we headed back to my house to get some serious crafting done.   The first thing on the list to "to dos" was to frost and decorate the cut out cookies I had made earlier in the week.  Unforturnaately I didn't take pictures of them doing them but they had fun and got them all decorated with VERY LITTLE MESS.   Horray!!!!!!
  And here are pics of the girls doing their projects.
 Here's Alyssa coloring snowmen on shrink plastic to make into earrings.     Fun stuff!
 And here she is making her snowman soup in a paint pail for her teachers Christmas gift.

Here's Freya coloring snowflakes she stamped on shrink plastic for earrings.   They turned out really cute.
  

Freya working on the snowman for her snowman soup pail for her teachers Christmas gift.

and here she is holding her snowman soup gift for her teacher.    The  girls  did a great job on these paint pails.   And from what I heard this weekend the teachers loved them. 

I want to thank you for following my blog these last few weeks.   I hope you enjoyed the pictures and ideas I shared.  Next year I will do 4 weeks of Christmas instead of 7 and will definely not have it run into the week of Christmas.    Have a wonderful holiday season everyone.    Merry CHRISTmas to you all.   I hope Santa is good to you and brings you everything you wished for.   I know I will get everything I wished for cause my wishlist consisted of all of my kids, thier spouses, and grand kids being here with us on Christmas eve.   It is always the highlight of my Christmas.

7 weeks of Christmas day 43

Today I have a cute little snowman tealight I made last Christmas.   Isn't he just the cutest?   And very easy to make.     His nose lights up.     I found the pattern here
Tomorrow I will share some pictures of my girls getting crafty at Grammys house.  Until then take care.

Saturday, December 14, 2013

7 weeks of Christmas day 42

Today is a busy one for me because I have my 2 grand daughters ages 9 and 11 here with me for a crafty weekend.    Watch for pictures next week of what we did.   But today I wanted to share a few pictures of the cards  I made to send out to my stamping friends.    I must admit these are all totally cased (copy and share everything) from stampers on the net but they were so lovely I just had to duplicate them.  
and here they are-------------


I am not sure where I found the original cards I cased, but it might very well have been Pinterest.   Hope my students like them.  
See you tomorrow with a cute little tealight snowman I made.    Until then, God bless.

Friday, December 13, 2013

7 weeks of Christmas days 40 and 41

Last weekend my 2 young grandkidlets spent the weekend with me.  I showed you yesterday what my 13 yo grandson and I made.  Now here is what my 9 yo grand daughter  did over that crafty weekend. First I want to share a picture of her after she finished decorating a purchased gingerbread house kit.   I think she did a pretty good job.  How about you?

and then I had some glass ornaments in my stash so I got out some clear glue, and glitter and she made these ornaments.    And did a very good job of it too!

   See you tomorrow with pictures of some of the cards I made to send out to my stamping friends.  See you then.  :)


Wednesday, December 11, 2013

7 weeks of Christmas Day 39

This past weekend 2 of my grandkidlets spend the weekend with me.   We did crafty things for Christmas (pictures of that tomorrow)  and my 13 yo grandson and I made this to munch on during the Packer game.  Everyone (including my fussy hubby) loved this and said I should make it again------soon!  
not sure where I found this recipe but it MIGHT have been posted on Facebook.   Here is the recipe.

WHITE CHOCOLATE SNACK MIX
1 pound block of white chocolate chopped into small pieces
3 cups rice chex
3 cups corn chex
3 cups Cheerios
2 cups thin pretzels 
2 cups peanuts 
12 oz package M and Ms 
Melt white chocolate.   I used a double boiler but you can do it in the microwave.  Just watch it very closely as it does burn easily.

In a large bowl, mix all the other ingredients together.   Slowly pour the melted white chocolate over the cereal mixture and toss gently so it is evenly coated with the chocolate. 

Spread mixture onto waxed paper and let cool.

When cooled, break into small pieces, and store in an airtight container.    Refrigerate to keep fresh.

Thats it for today.   See you all tomorrow for another holiday post.

Tuesday, December 10, 2013

7 weeks of Christmas day 37, and 38

Horray    I am caught up with this post.    Hopefully now I will keep up with the daily postings.   Today I am sharing a couple more items that I had on display at my holiday open house in November of 2010.     Hope they give you some ideas of things  to do for YOUR holiday gifting.
The first picture is an assortment of holiday gift bags/boxes I made.   I used the Sizzix Bigs Fancy Favor box die.   SO easy to create fun boxes/bags with it.   IT cuts and scores all at the same time.   And there is NO limit as to what you can use for cardstock, could be plain white, colored, embossed, or even designer paper.    With these, I used just plain white cardstock and just did each one differently using different techniques.
Aren't they sweet.    and big enough for small gifts such as candy treats, a gift card, jewelry.


Now this has always been one of my favorite projects.   And oh so each to create.   First I started with an inexpensive wine glass.   Using a piece of vellum and this pattern-------http://www.ruthannzaroff.com/mirkwooddesigns/glassshade.htm
I created the lampshade.    I used a scalloped scissors (could use any border punch instead) and a tiny round hole punch to create bottom border.   Using a blue marker, I colored the back of the vellum with blue ink, but first I masked off a circular area for the moon.   Then ON THE FRONT SIDE OF THE VELLUM,  I stamped the tree line from SU using Versamark.   I used white embossing powder over the versamark.   Then I removed the mask, and using a dauber the yellow ink (a marker would work just as well),  I colored the moon.
I used sticky strip to hold the vellum together at the back of the shade.   Now just set it on top of the wine glass, add a battery operated votive candle and watch it glow.  I also tied a little ribbon bow around the stem of the glass and added some die cut snowflakes.
Well thats it for today my friends.   Hope you are enjoying my trip down memory lane as I share items I have made for the holidays with you.   See you again tomorrow with some pictures of my grand daughter and I  creating some fun Christmas gifts.

Monday, December 9, 2013

7 weeks of Christmas Days 34,35 and 36

Hi there.  Still playing catchup with the 7 weeks of Christmas.   Today I will share more pictures of the items I had for display at that holiday open house in Nov of 2010.
This first picture is a pretty little box I made, sectioned off so there were 4 compartments.    Inside each compartment were git tags I created using Stampin Up stamps.   Made a nice little gift for a friend.

and this is a mug I made from the Sizzix pillow box die.   I filled it with cocoa, hersheys kisses, mini marshmallows and a candy cane.   Another sweet gift for a teacher, hairdresser, or anyone you wish to give a "little something" to.
Here is another fun little item to make for a little gift.   I punched out 6 white circles, and 6 scalloped navy blue circles.   Stamp them with snowflakes and mounted the white circles to the navy ones.    I created a snowman face on 2 of the white circles.   Then I sandwiched a York peppermint patty between the 2 face pieces, and did the same with the other circles.    Then I just placed them in a narrow cellophane bag so that it looked like a snowman.    Tied it off at the top with a little piece of ribbon.
Well I hope you enjoyed my shares for today.   Tomorrow I will be showing more 3 items I made for the 2010 open house.    And that should catch me up with the postings to day.  See you tomorrow.   :)

Sunday, December 8, 2013

7 weeks of Christmas day 31, 32 and 33

OMG  I have reallly gotten behind haven't I.   Well I will try to catch up over the next couple days.  It has been very hectic as I am sure you can all relate to.   This time of year is just crazy. WHY oh why do we pile so much on  ourselves at holiday time?
Anyway I will include 3 days posts today.
The first picture I am sharing is of a card buffet I offered in my home in 2010.   We did 5 cards that night.   The stocking is actually a gift card holder.  
for the 2nd share of this post,  I am showing a picture of a free make and take I offered in a holiday open house in Nov of 2010.   Everyone was treated to homemade cookies and hot cocoa.    I had tons on samples out for them to view as you will see in the next picture.   It was a fun day for all of us.
The last picture for this post is one of some of the samples I had made for this open house.   I am HOPING to have another open house NEXT Nov, 2014 as I enjoyed doing the one in 2010 so much.  
Click on any of the pictures for a close up view.    Until tomorrow when I will do days 34, 35,  36.
have a great Sunday,   GO PACK GO!
 

Saturday, November 30, 2013

7 weeks of Christmas day 30

and the last day of November.  Where DID this month go?   Have you finished your Christmas shopping yet?     Me?   nope   I have a long way to go yet.   But I have 3 1/2 weeks to get it done along with the cleaning, baking and decorating.    I will get it all finished in time, I always do.  :)
Today I am sharing a picture of a project we will be making this coming Tuesday at my Hobby Lobby cardmaking class.   It will be the last one for 2013.   This box contains snowman soup.   A packet of hot cocoa mix, a bag of marshmallows, some snowman kisses(hershey kisses) and a peppermint stirring stick.   I found this idea on Splitcoast Stampers website and pretty much cased it.    Isn't it cute?  and what child (or adult for that matter) wouldn't love to receive this cute little gift?   All the goodies are contained in a plastic card box which I purchased from Gina K Designs.  
There is still room in both the morning and evening classes on Tues Dec 3rd  at Hobby Lobby Ashwaubenon if you wish to attend.  Just email me at kamperstampr@new.rr.com to reserve your spot in class.  
See you tomorrow with another holiday post.  

7 weeks of Christmas day 29

Today I want to share a couple gift card holders I made for a class I am having next week.    These were fun to make.  It is always nice to present a gift card in something pretty and fun.   AND they can be reused next year.
The first one uses retired designer paper from a Stampin Up.   It folds like a tri-fold wallet.   and the gift card pops up when opened.  Click on the pictures for a close up.


and the other gift card holder we will be making is this scalloped circle card.    It has a pocket inside to slip the gift card into.


thats my share for today.   See you again tomorrow with more holiday ideas and memories.  

7 weeks of Christmas Day 28

Hi everyone
Today I am sharing a picture of Mr Frosty.   He was our outdoor decoration for a few years.   As you can see, he WAS huge.   But alot of fun.  He got lots of looks as people drove by.   Anchoring him down so the wind would not move him was quite the trick.  As you can see in the window behind him,  that was when I had the store yet.   OMG   alot of years ago.  
I will be back tomorrow with more holiday ideas and memories.  Hope you'll join me then.  

7 weeks of Christmas day 27


Today I am sharing a picture of our Christmas tree 2005.   What made this one a special memory for me was the rocking chair you see in the lower right of the picture.   I purchased it unfinished and painted it for my then 2 year old grand daughter.    I had so much fun painting and decorating this chair for her.   I added her name using a stencil and stamped roses across the 2 white boards on the back of the chair.   White polkadots covered the seat.   Do you think I got it bright enough? LOL What a labor of love it was.  

and here is a closeup of the chair.
 Be back tomorrow with another Christmas post.    

7 weeks of Christmas day 26

Today I want to share a picture of my grand daughter making cookies.   We had so much fun creating these adorable reindeer cookies.  Can you tell she is having fun?  
she is putting on his raisin eyes and cinnamon redhots noses.     Such precious memories.  
See you tomorrow with yet another holiday share.

7 weeks of Christmas day 25


Today I want to share a picture of a popcorn box I created a few years back.   It was an item I offered in my store  at holiday time.    This box was quite tall (about 11  1/2 inches) so it left alot of room for stamping.    Here is what I came up with.
see you soon with another holiday share..

7 weeks of Christmas day 24

Today I am sharing a picture of our living room Christmas tree.  Jack puts it up every year and then puts on the lights.   This year he decided we needed more lights, or off we went to Menards for 2 more sets.   I DO like it better with the extra lights though.
After he gets the lights on, I take over and place the spiraling ribbons, and ornaments.  Then the big bow at the top.   After thats finished he spends a couple days rearranging  and adding more ornaments.  
Well here are the pictures.   I love this tree, especially at night.  It glows the most beautiful shade of blue.  People slow down as they are driving by to look at it.   Kewl!
Here's the tree master setting up the tree-------    Notice Buddy is supervising.  LOL
and here it is all decked out with blue lights, ribbons, and all blue baubles.  I LOVE this tree and will have a hard time taking it down again come the middle of January.  

That's it for today.    Be back with more on Day 25.

Monday, November 25, 2013

7 weeks of Christmas day 23

Today I want to share a picture of a candle I altered for a holiday stamp camp.  A simple project, but what we did to decorate the candle made it special I think.
 You don't have to spend a lot to give a beautiful gift.  The candle holder was something I picked up at a rummage sale,  and i just added a pretty ribbon and bow, and stamped a tag.  
See you tomorrow with more projects from that holiday stamp camp.    Have a great Monday.


7 weeks of Christmas day 22

Today I am sharing a gift card holder I made for a class I am offering a week from tomorrow.   Paper is from Stampin Up.  

I added a small die cut and embossed panel to the lower part of the insde that says Merry Christmas.   See you tomorrow with another Christmas share.

Saturday, November 23, 2013

7 weeks of Christmas day 21

Today I am sharing another card we did last year for the holidays.  It is a card and gift in one.   The card folds up and when opened makes a cute little desk calendar to be enjoyed all year.  

See you Sunday with another holiday post.